Site Deployment Wizard
The Connectivity Wizard—built into the Generac Link platform—guides field technicians and our channel partners through the steps to deploy a Site and to configure equipment according to specifications. Parameters include location (postal address verifiable with latitude and longitude coordinates), generator asset model information, hardware serial numbers, power specifications, and a gateway ID.
Once the user does a quick walk through and enters values for the required fields, generator(s) status is verified within the user interface. Telemetry data can then be monitored on an ongoing basis so that onsite resources are able to monitor and manage equipment leveraged for an industrial backup solution. The user also has quick access in the application to documentation appropriate to the connected hardware at a site level.
This topic lists the quick steps needed to enable asset connectivity using an Advanced Gateway. The following tutorial also provides a video walkthrough.
Configuring and Deploying the Site
Be sure to have your hardware specification sheet available. This wizard requires entry of rated power, amperage, voltage, and other commonly-referenced parameters.
Site Deployment access is required to run this wizard. Access must be toggled on for the user via User Permissions in the Settings menu.
Choose the Site Deployment menu option from the Settings drop-down menu.
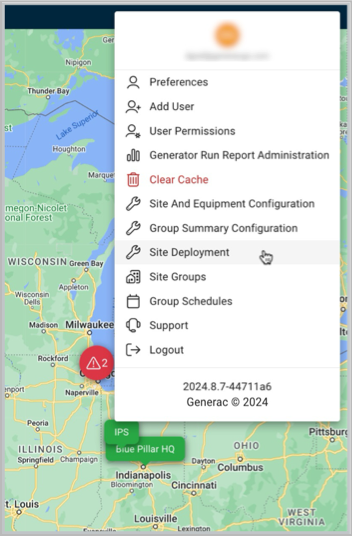
Site Deployment Menu Option
Commissioning the Gateway
The steps in this section provide instructions for commissioning the gateway in order to enable 24x7 connectivity.
For models listed in the table here, the Gateway is attached at the factory before delivery to your site. For such units, the gateway serial number—required to step forward through the Wizard—will be visible through plexiglass. To locate the serial number in earlier models, refer to the packaging with the gateway hardware.
Because the print is small, obtaining the gateway serial number may require snapping a photo and then zooming in order to read all the digits.
Generator Models with Factory-Attached Advanced Gateways | ||
|---|---|---|
SD Series | SG Series | M Series |
| ||
| ||
| ||
| ||
| ||
| ||
| ||
| ||
SD900/30.6 Perkins |
| |
| ||
SD750/33.9 MHI |
| |
SG1000/49 Generac |
| |
SD1000/Volvo |
|
|
|
| |
Excludes Diesel engines below 200 kW, gas engines G9.0L, 150kW and below, as well as ROW and OEM units.
Using the Wizard, the user is presented with the following screen when registering equipment. When a Gateway serial (not generator) number is entered, the system checks against our database for validation. If the serial number is already in use on the instance, the next button will not be enabled and you will not be able to proceed.

Prompt for Gateway Serial Number
After entering a valid Gateway Serial number, the Next button is enabled. Then the user can proceed with completing the Wizard.
Site Name and Equipment
In Step 1 of the installation wizard, the field technician will create a generator equipment profile, describing the physical premise and associated hardware. Some fields have been pre-populated with entries for convenience. If necessary to replace these values, simply type into the field to update from defaults.
Enter a Site Name, describing the location of the equipment. When choosing a name, ensure the entry is unique against other Site Names on the same instance.
Enter the street address.
A second address line field is optional. This is provided to accommodate a unit or room number.
Type or use the drop down to select the state.
Enter the Zip code. You will be asked to verify this in a modal, which will structure the address according to U.S. Postal Service formatting.
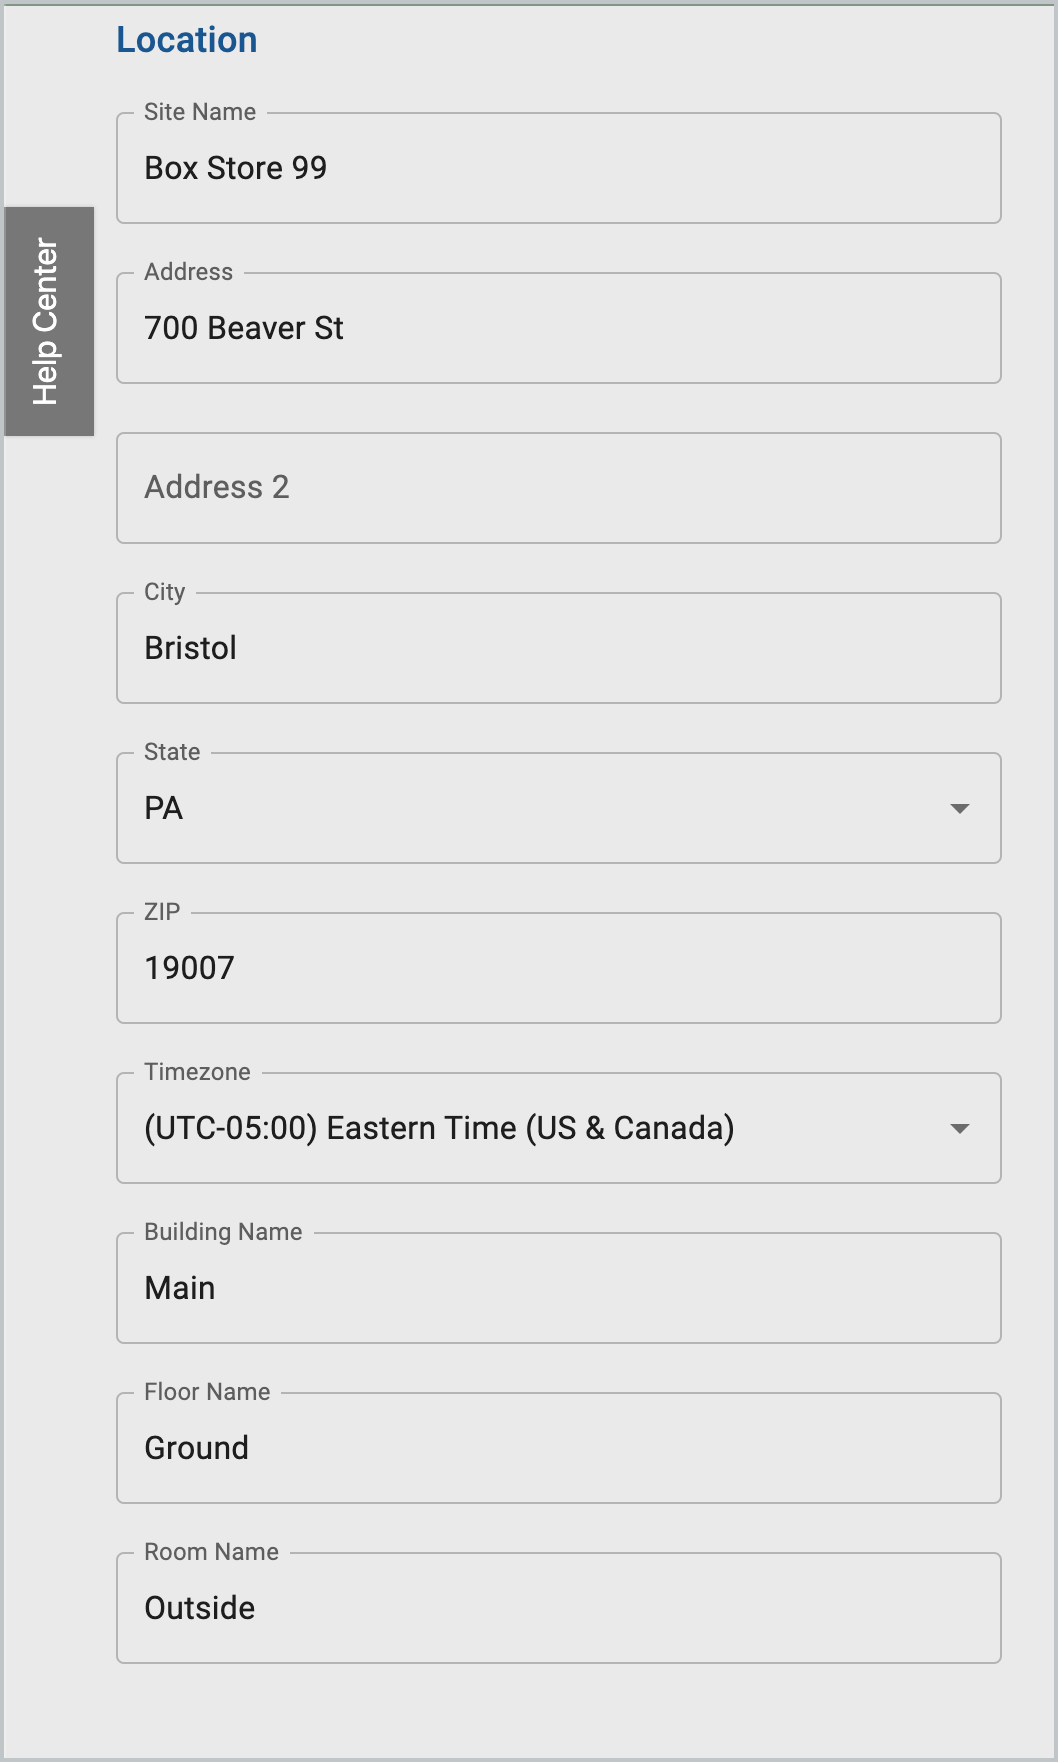
Wizard Step 1, Column
Toward the bottom of the first column, select the Timezone of the equipment using the drop-down menu. This will be reflected in reporting data downstream.
Fields for Building Name, Floor Name, and Room Name are available. Defaults are displayed in this capture. Simply type into the field to replace the defaults.
All fields are required aside from the second address line.
In the second column of the asset profile page, add the remaining details.
Enter a descriptive generator name to facilitate easy reference for maintenance and monitoring.
Enter the manufacturer.
The Controller field is selectable using the drop-down menu. If not MODBUS compatible (client-server data communications protocol), choose Hardwired.
Model and serial numbers are found with the original equipment packaging.
Enter rated power (in kW) and amperage by typing into the respective fields. These should correspond with the generator’s specification sheet.

Wizard Step 1, Column 2
Use the radio toggles to select the Output Voltage Type.
Enter the output voltage listed with the hardware specifications. Common presets are available once clicking into the field.
Complete the fuel type entry using the pop-up menu when clicking into the box.
For gateways that are not attached to the asset at the factory, the serial number is located on the front of the device, and/or included with the product materials.
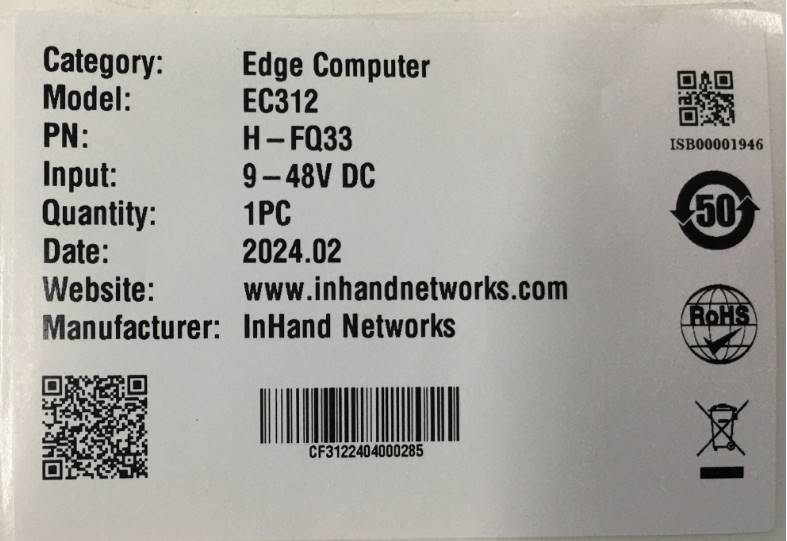
Gateway Serial Number from Packaging
Once the Site and equipment details are complete, the Next button will be enabled.
The wizard provides the user with the option to accept the USPS formatting standard, which includes a Zip Code extension. Latitude and Longitude will populate the location automatically once a street address is accepted by the platform.
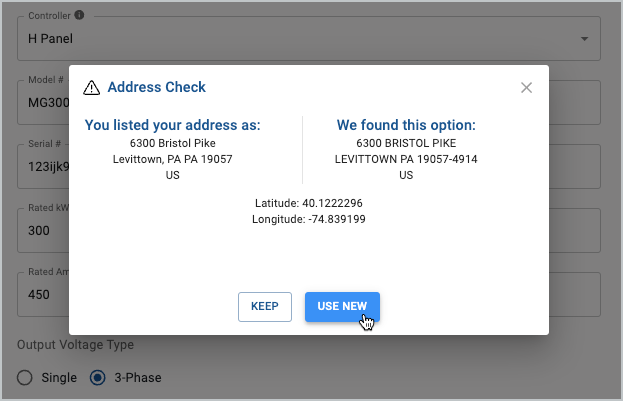
Address Verification Modal
In Step 2 of the Installation Wizard, be sure to click the Save & Download button to enable communications with the Advanced Gateway.
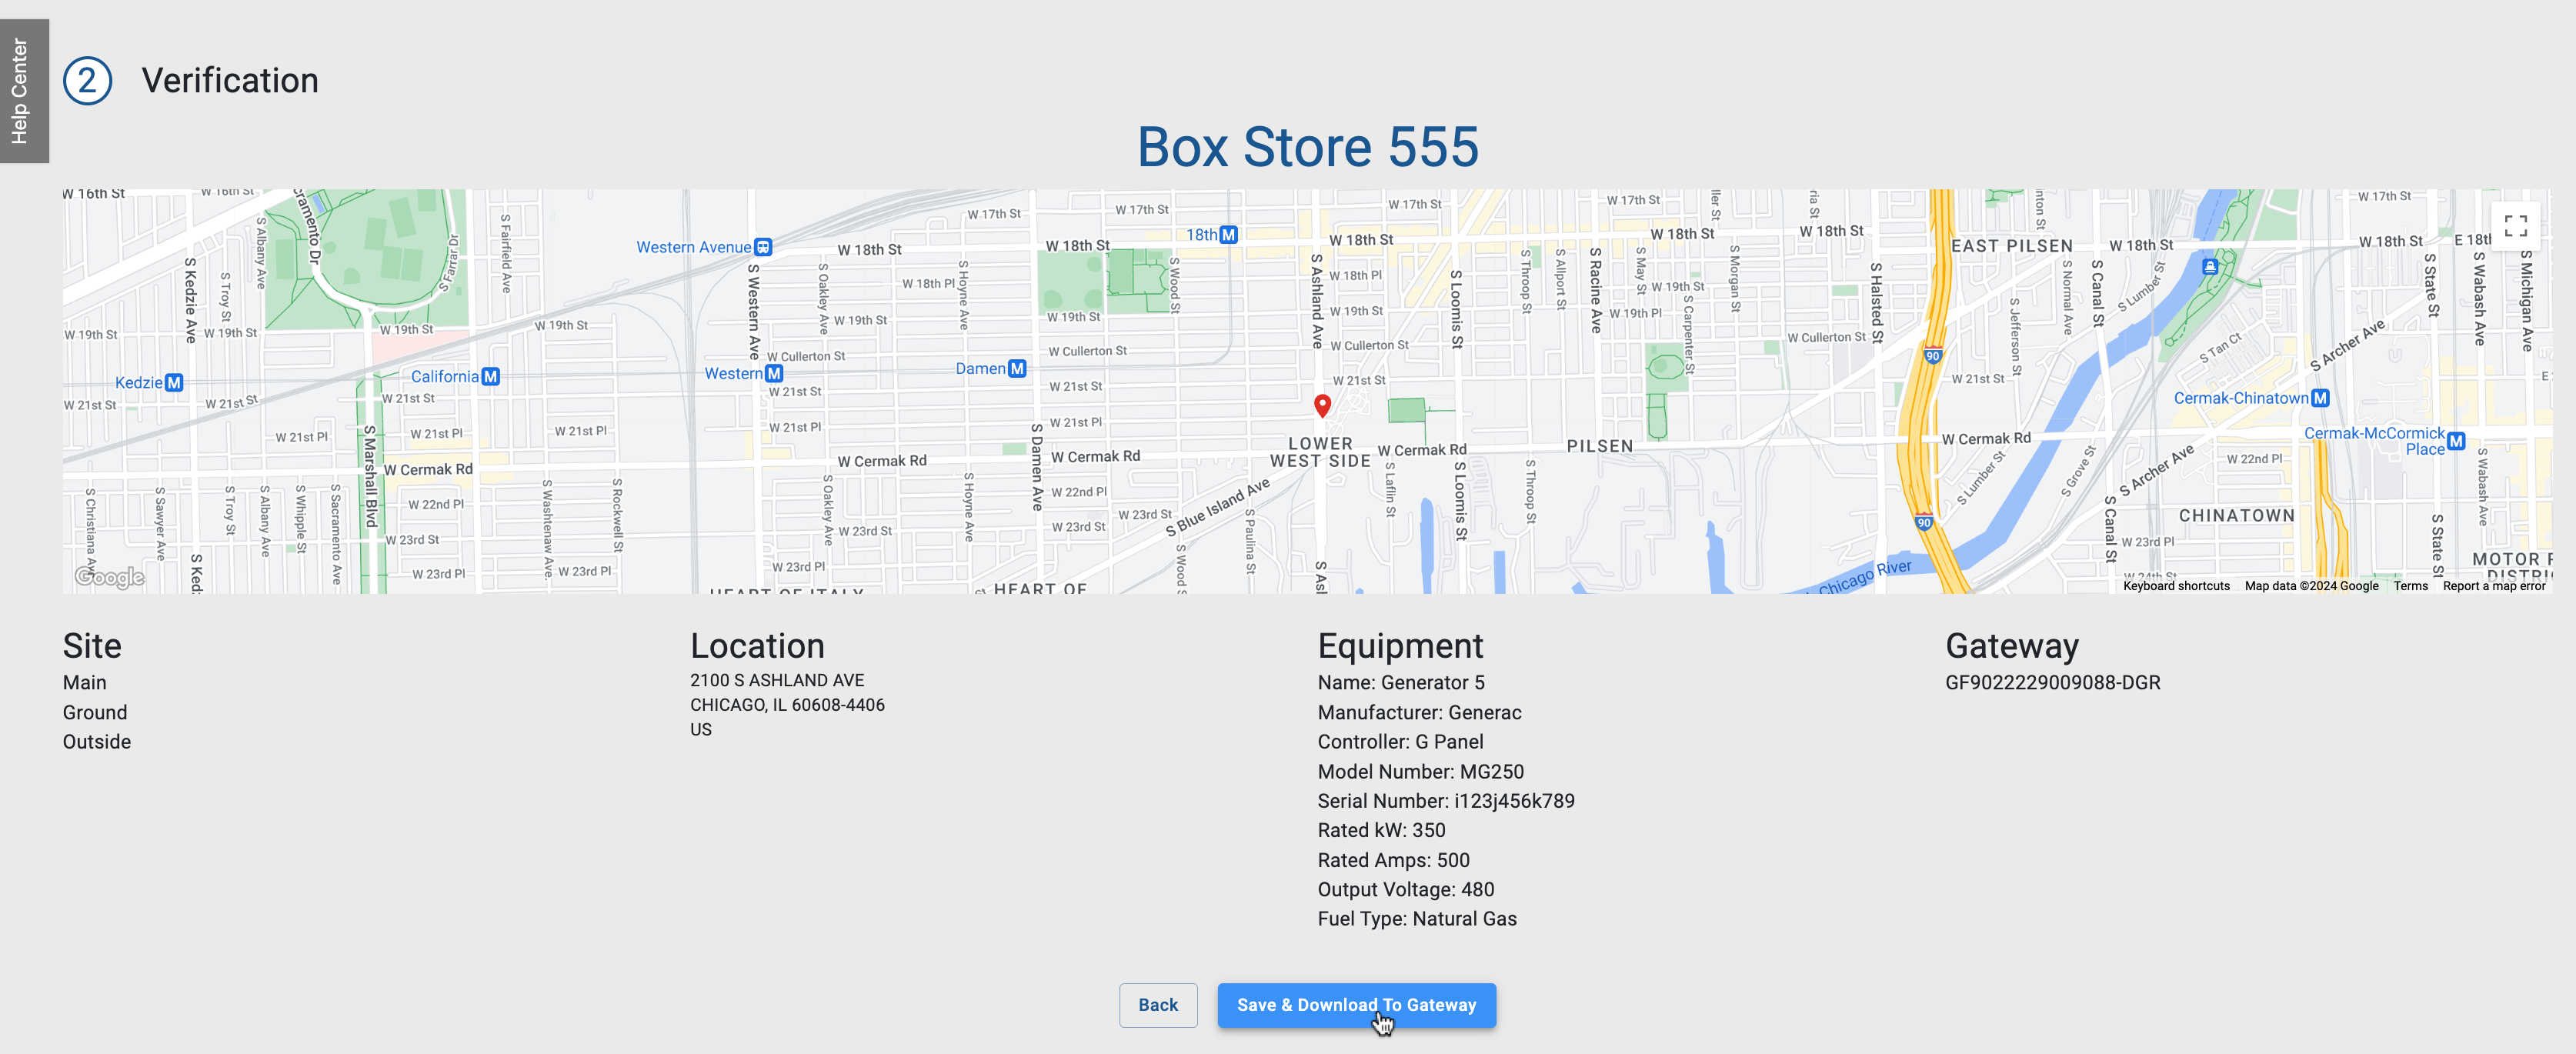
Step 2 Verification: Save and Download
A secondary modal will prompt the user for confirmation. A validation screen appears next, confirming location details as configured by the installer. Sufficient signal strength will be indicated with at least two bars.
Click the Back button if you need to make changes to the entries.

Click Details button to look further at connectivity data. Click Done in Step 3 to return to the Map View.

Verification Screen
Numerous supporting topics are available in our community knowledge base. Check for equipment-specific support or announcements on future enhancements in our release notes. Full details at https://support.energyservices.generac.com.
Site Modifications
Once a Site is created on the platform, limited modifications are available through the Site and Equipment menu. However, if you have not saved the new site yet, you may also navigate in reverse order in the wizard.
Administrators can update the site name, geo-coordinates, time zones, and alarm settings, and telemetry types that populate the live stream (see next section).
.png?inst-v=937239c8-87ea-460c-ab29-063831acbc57)
Alarm Settings
Once this wizard is complete and saved, generator specifications entered in step 1 of the wizard are not changeable without a Support ticket.
Monitoring
To view generator's live data, click the site pin from the Map View. Be sure to check out our section on trending and telemetry.
