
Equipment Configuration and Alarm Setup
Be sure to jump to step 11 in order to view Alarm Configuration.
Login as an Administrative User.
Click the Settings icon in the upper right corner of the application and select Site and Equipment Configuration from the menu.
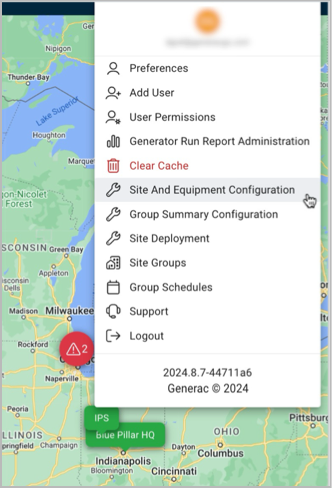
Site Equipment Configuration Menu
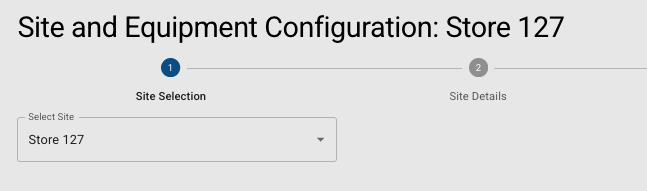
Select a Site from the drop-down menu. This will enable the next button. Click to proceed.
In screen 2, be sure the field entries for Name, Address (for stationary sites), and TimeZone are accurate and complete.
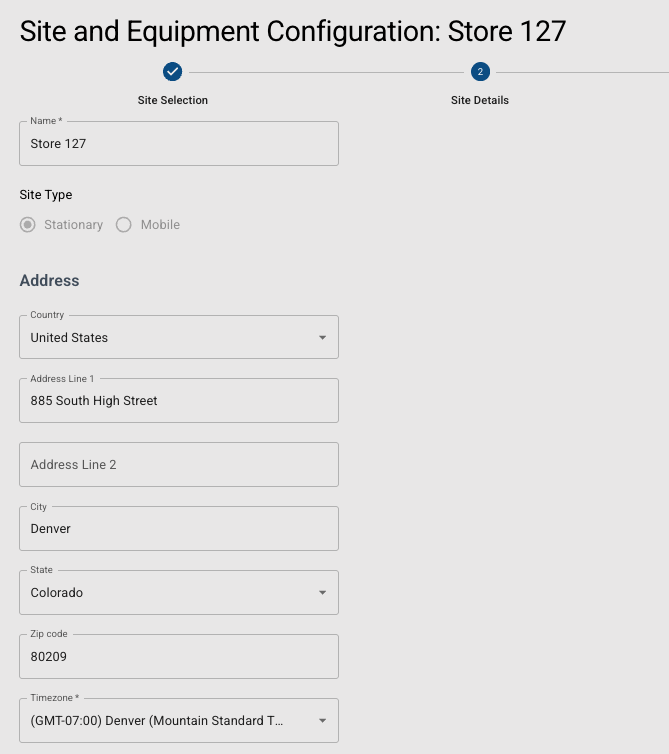
Click into the field if modifications are needed. Use the up/down arrows to adjust the Latitude/Longitude values by one degree. For incremental, fractional adjustments, type the new value over the decimal you are replacing.
Changing the name of the Site will require a Support ticket.
Click next when ready to proceed to the equipment types.
Toggle the equipment types to be displayed on the site summary screen. Click next when ready to submit these choices.

Other equipment types, such as for ATS, would also render and be configurable on this page if applicable at your site. | 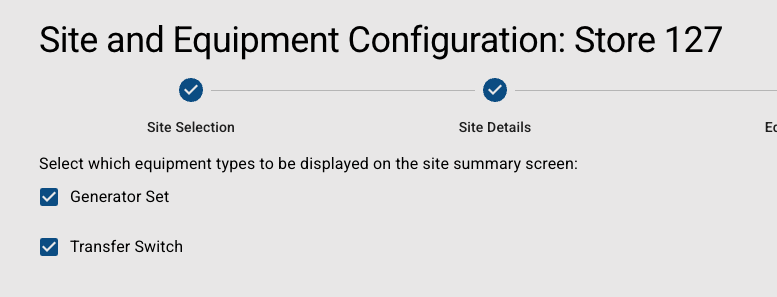 |
Select the available data points to be displayed by individually clicking the equipment data name in the Available section, then use the right arrow to move to Selected.
If all equipment data points needs to be selected/removed, use the multiple arrow button.
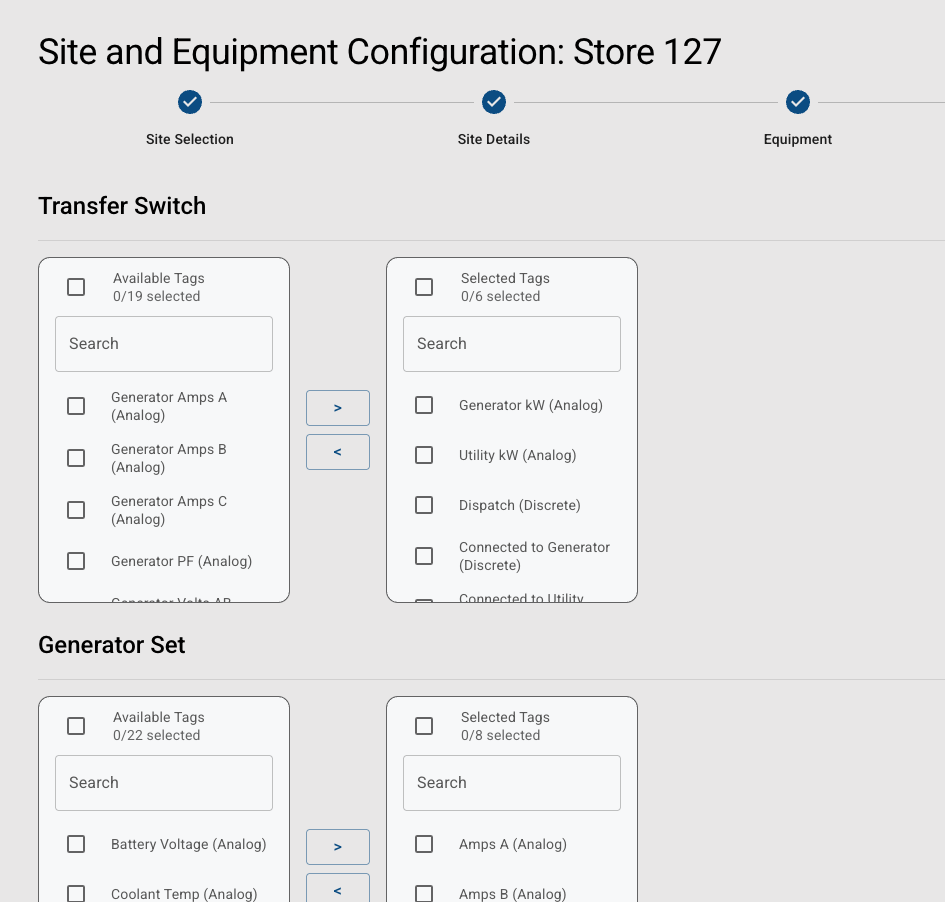
Once equipment data is selected, you can re-order the list as they appear in the Live View Summary page. Click an item and use the up and down arrows to adjust the order.
Click next when the list is ready to proceed to Alarm setup.
The Alarm page will display all the equipment data.
Click the Alarm toggle next to the equipment data value to enable those respective alarms.
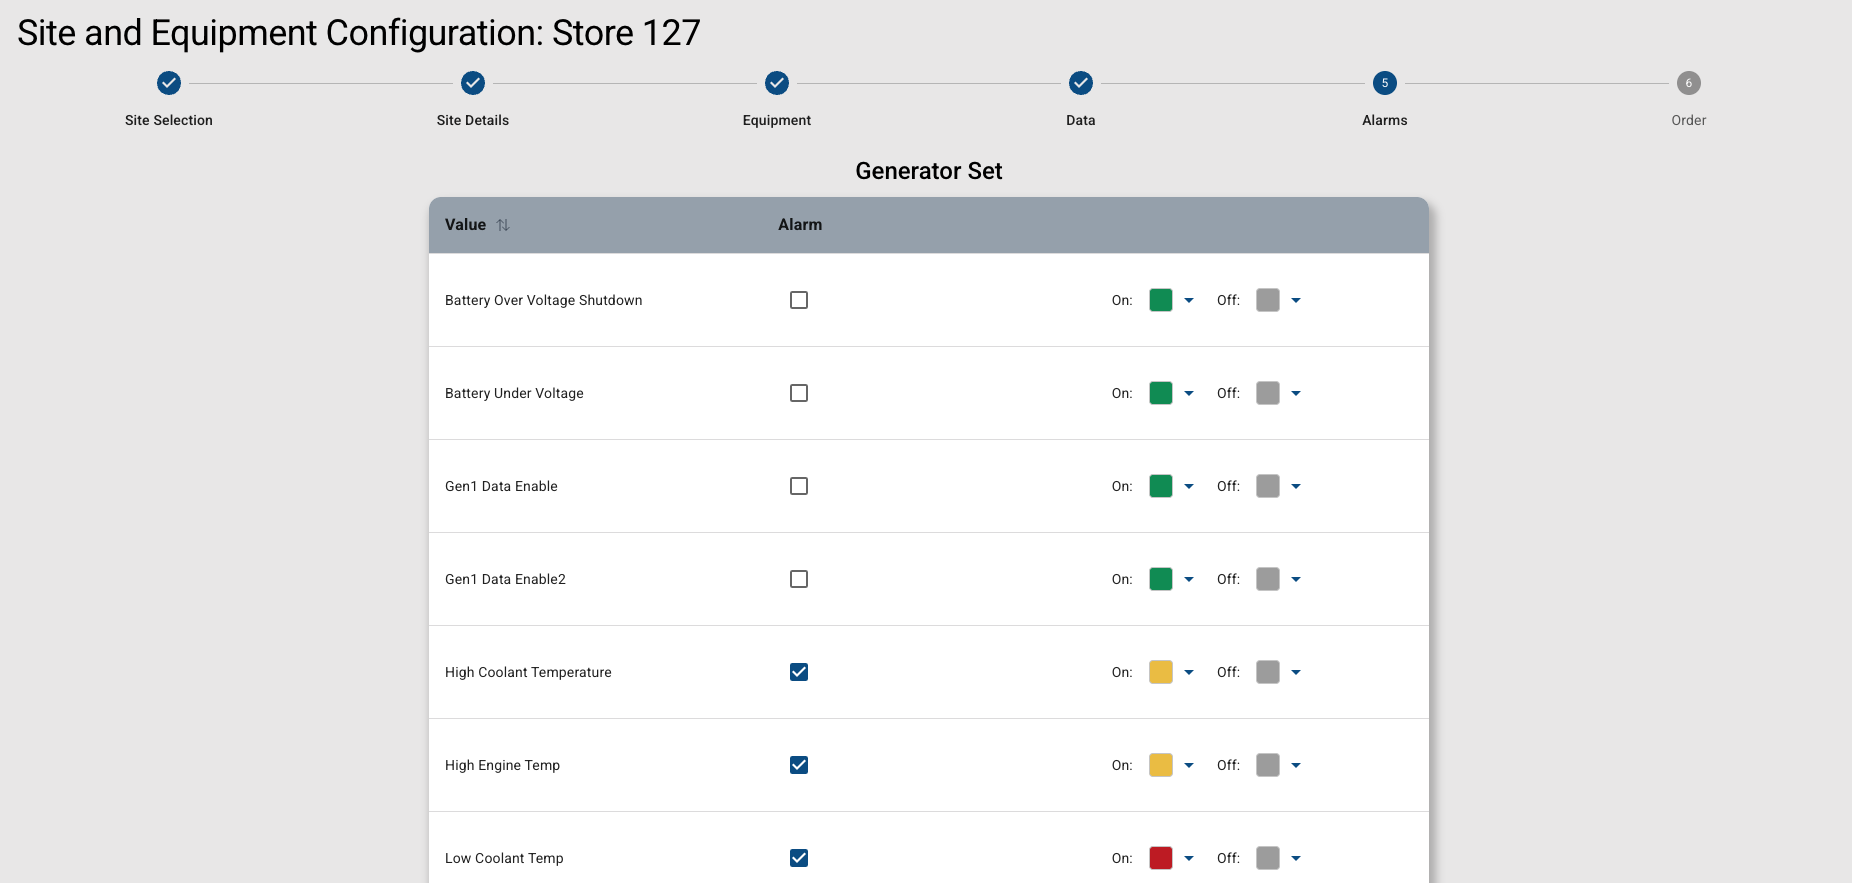
Alarm colors of Grey, Green, Yellow, and Red can be used to communicate urgency level.
Click the Change button.
Click next to configure the Equipment display order.
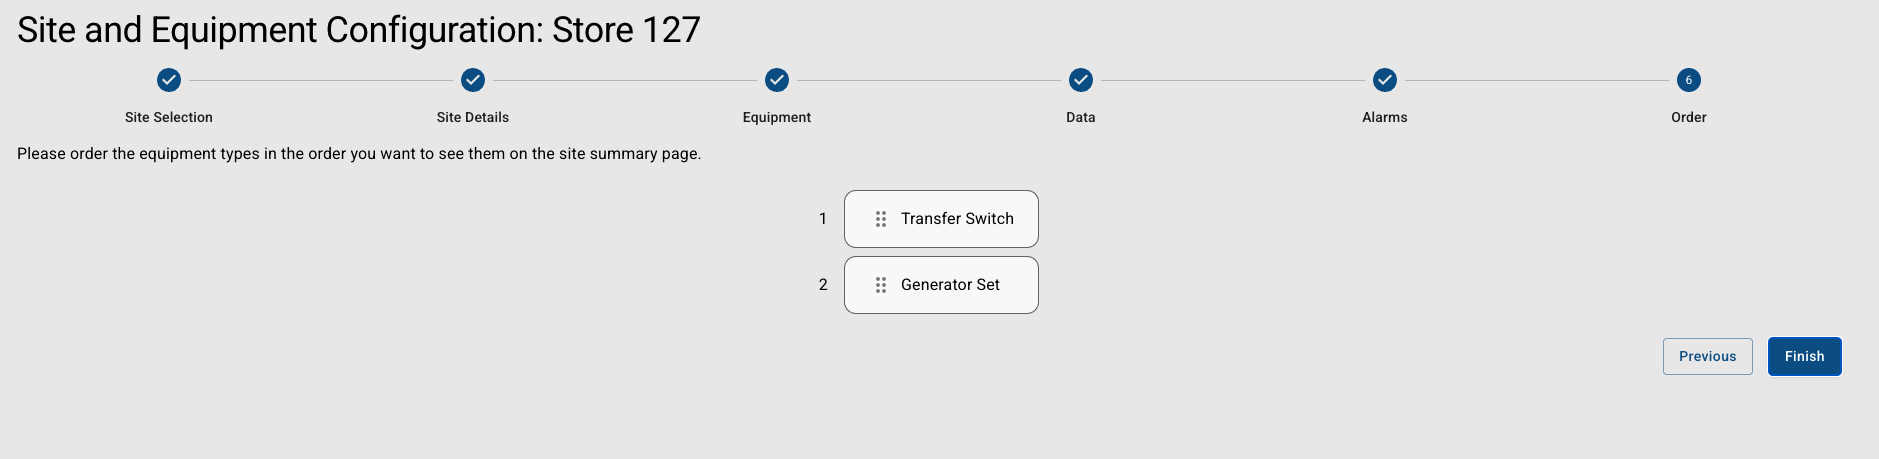
To change the Equipment display order, click an item and use the up or down arrow to adjust.
Click save to complete the configuration.
At any time during configuration and before saving, you can move back to a previous step using the Previous button.