
Dispatch Schedules
Generac Link offers the ability to schedule a dispatch for equipment that can be controlled remotely. This could be necessary for scheduled outages, load shedding, testing and maintenance, as well as for Demand Response events executed at the utility level.
To enable equipment for scheduling, the equipment must have Dispatch configured for your instance. If this is not set up, please contact Customer Support for assistance and configuration. See also Group Dispatch setup for supporting detail.
Schedule Equipment Dispatch
Navigate to the Site that you manage.
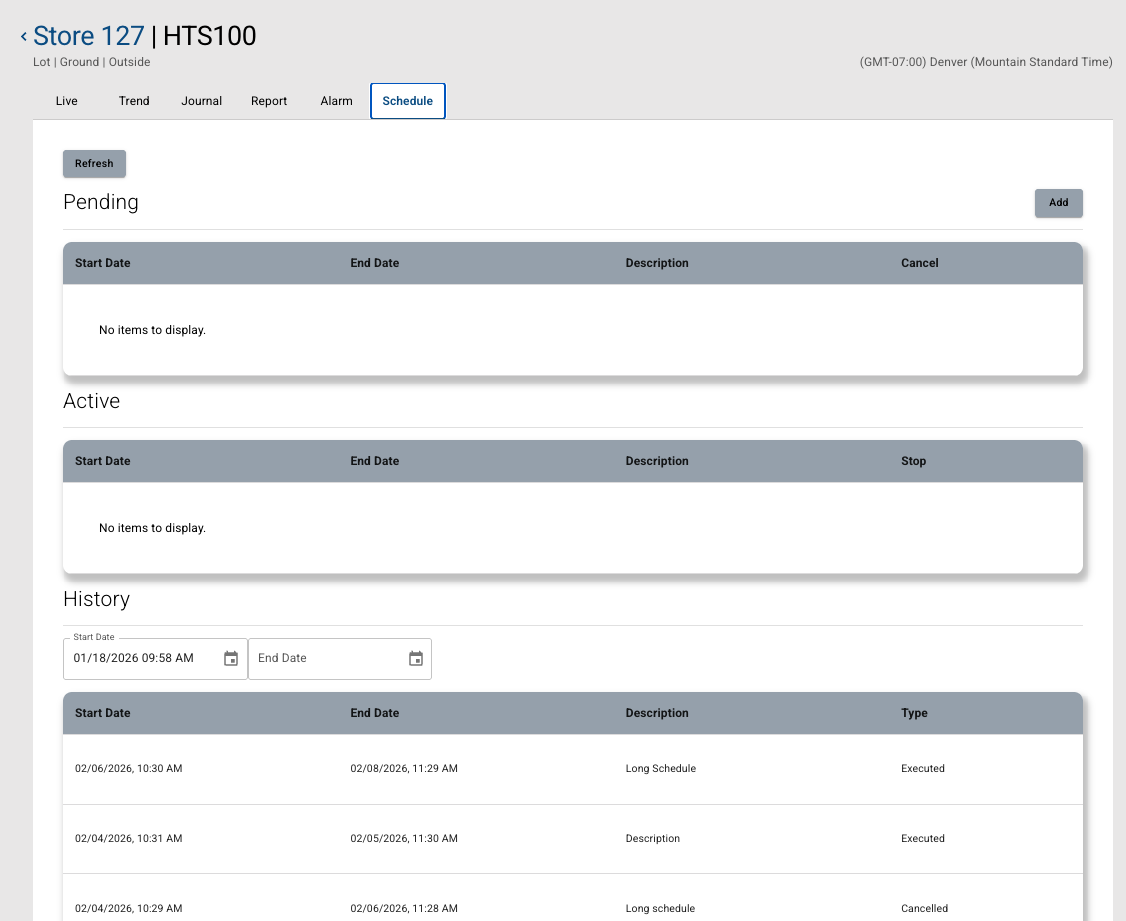
Click the Schedule tab.
The application displays Pending, Active, and Historical events.
To schedule an event, click the Add button.
An entry for the Description field is required by the application in the scheduling modal.
Select Immediate to start the generator engine once this modal is saved. Select the Future toggle to schedule an event.
In the event schedule (see Future toggle), enter a Start Date/Time or select one using the calendar and clock icons. You will need to select the date, time, and AM or PM.
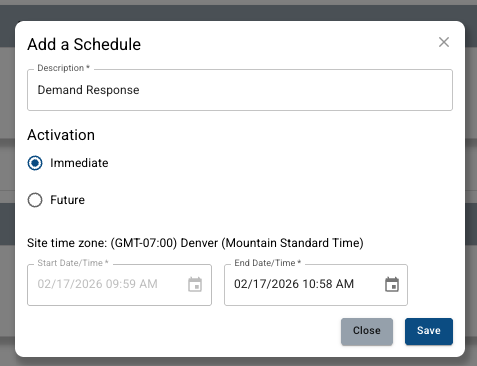
Using the clock icon, the hour you select must be in the future. End-time selections will default to half-hour increments starting with the time the modal is launched.
By default, the event duration cannot exceed 12 hours. If a longer event duration is required, please reach out to support.
If analog setpoints are available, then enter the start and end values. The capture illustrates an analog setpoint potentially conforming to a baseline load valid at the times configured here. Units are in kW (implied).
Click Save.
The application adds the event and displays a schedule in the Pending section.
See also the next section for dispatch modifications and cancellations.
To view schedule details, click a row of the scheduled run and the application will render the information on screen.
When the equipment is dispatched, the pending event moves to the Active section. During the scheduled event, you can view the equipment activity in the Live Equipment Detail View. Once dispatch completes, the events move to the History section with a type of Executed.
Modify or Cancel Scheduled Dispatch
Pending dispatch schedules can be edited or canceled at any time before the run
Modify/Edit Events
While on the Schedule view, for a pending or active event click the event row.
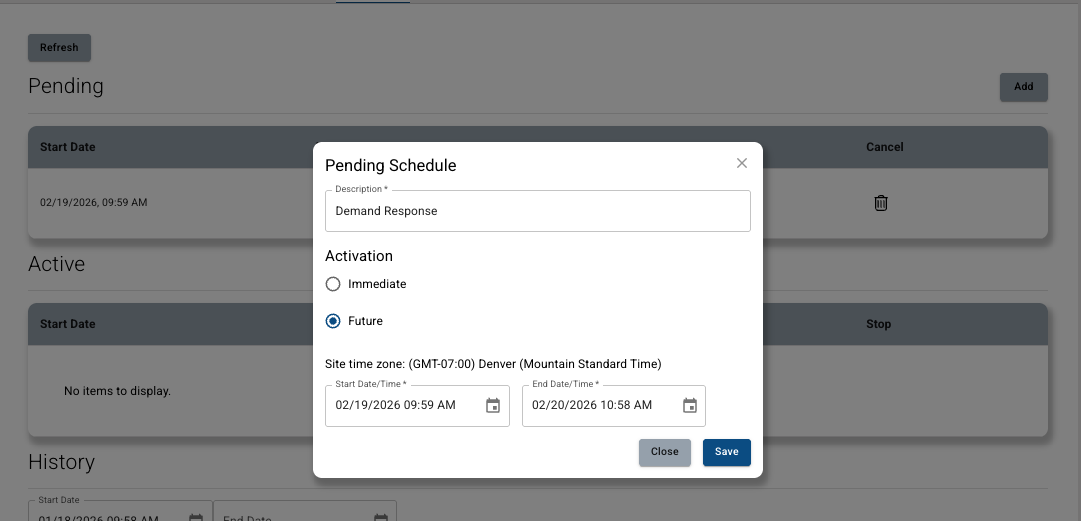
Select the new date/time criteria for the event.
Confirm by clicking Save.
The application displays the newly selected criteria for the event.
All criteria for a pending event can be modified. However, for active events, only the end date time can be modified.
Cancel or Stop an Event
If you want to stop an active run, click the Stop button in the Active section. When necessary, future events are canceled from the Pending section.
Click the Cancel or Stop icon.
Confirm by clicking Ok.
The application cancels the scheduled event and displays the cancellation in the schedule history.
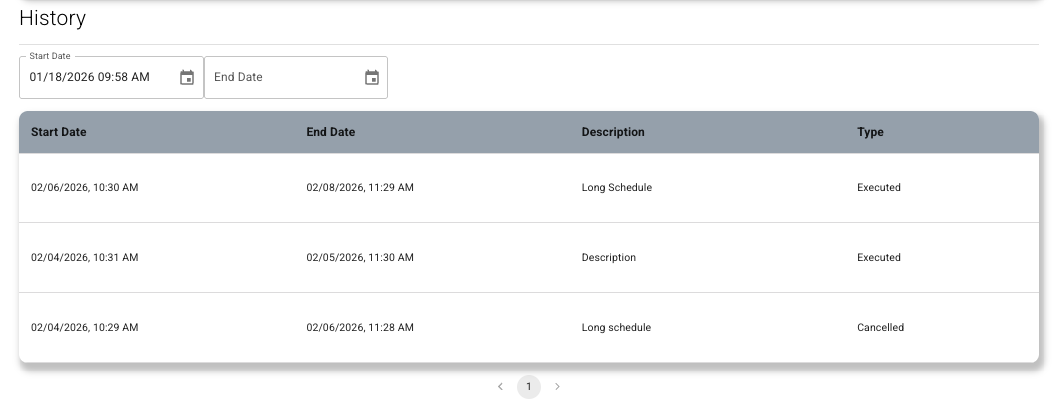
Event History
Canceled and executed events populate the History section of the page. Prior events can be viewed by updating the date filter. By default, the last 30 days of events is displayed.
Notes and Highlights
The Schedule tab is visible once equipment has been configured with a Dispatch control point.
Equipment set points can be configured to set analog values at the start and end of the event.
Start Date/Time must be a future date/time.
End Date/Time must be greater than the start date/time. Duration cannot exceed 12 hours.
The timezone displayed corresponds to the configured site timezone.
Different site equipment can be scheduled with overlapping times.