
Power Zone Pro Sync Setup
This section describes a typical setup for the Gateway connecting to the Pro Sync Display RS485 port. A typical setup for the Gateway connection to the RS485 Annunciator is provided in the first illustration.

Typical RS485 Setup
A BMS connection to the Pro Sync display can be achieved with Modbus TCP/SNMP protocol, requiring a BMS-computer connection.
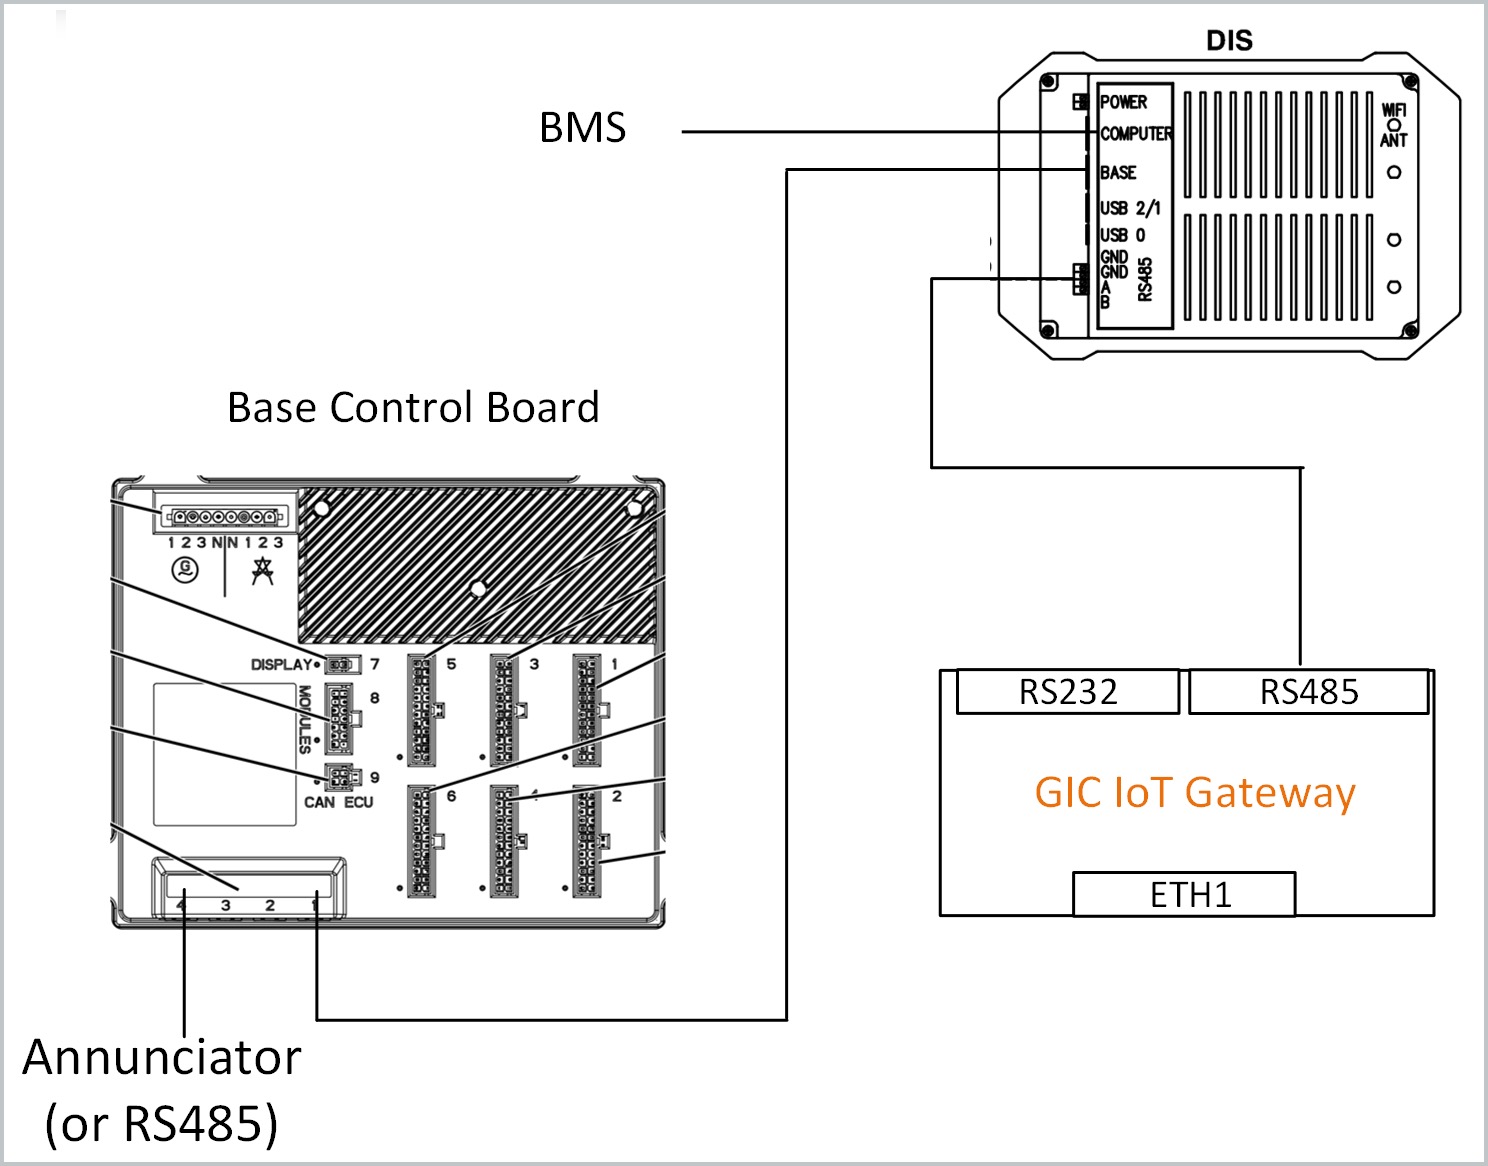
BMS Connection Via Modbus TCP/SNMP Protocol
A BMS connection to the RS485 can be achieved with Modbus RTU protocol.
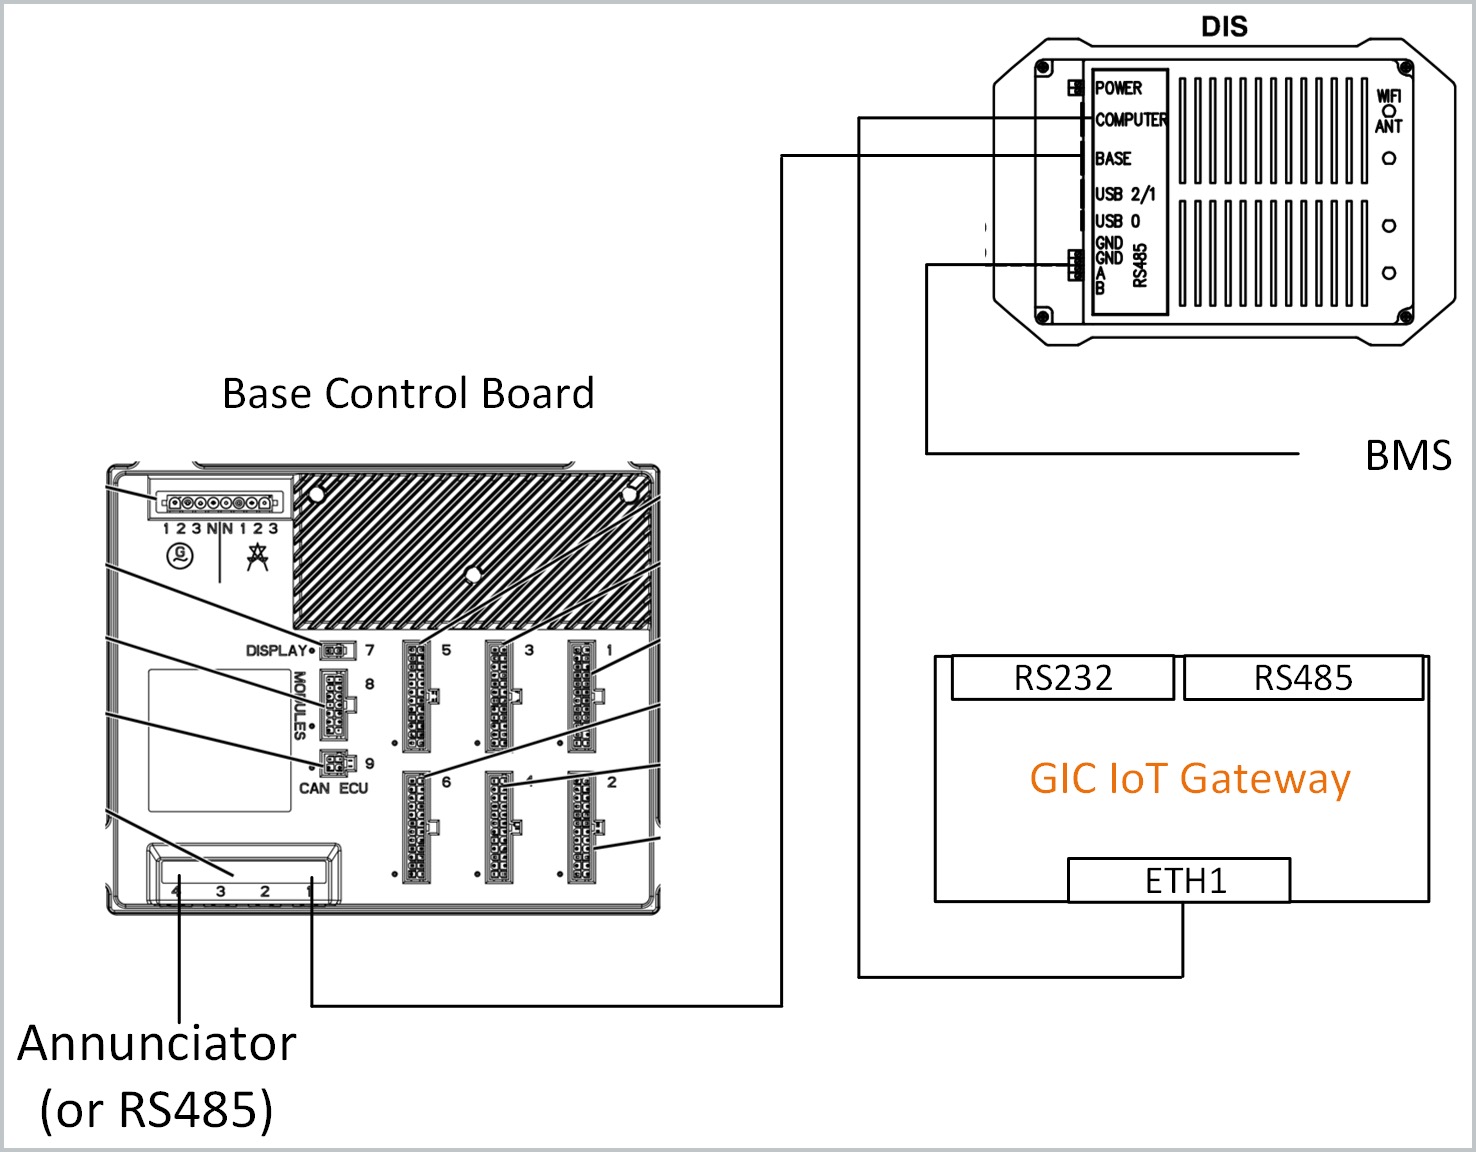
Gateway Connection with Modbus RTU Protocol
Steps to configure the TCP port are provided in this section.
Via the touch screen display menu: a) Navigate to the Setup menu at bottom of screen b) Navigate to the Communications module c) Select External Interfaces menu option.
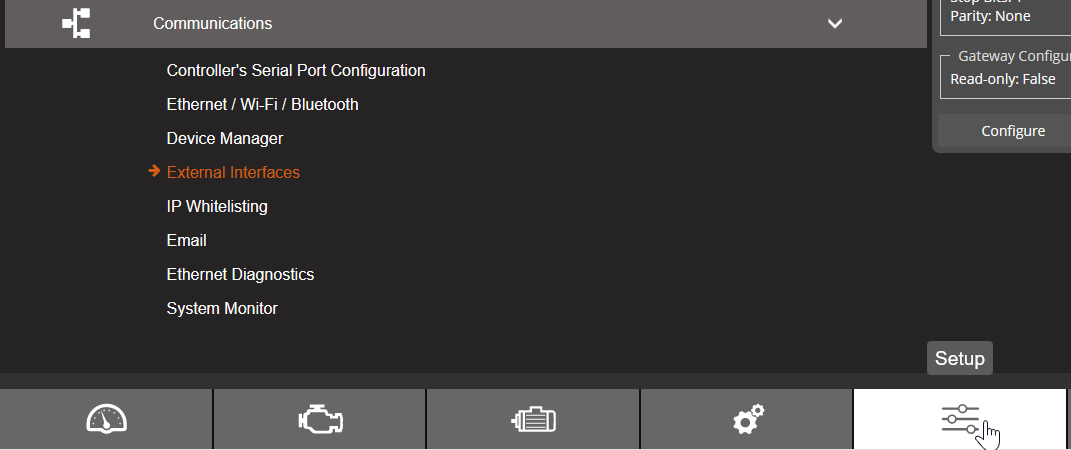
Communications Module
In the Ethernet Built In module, click the Configure button.
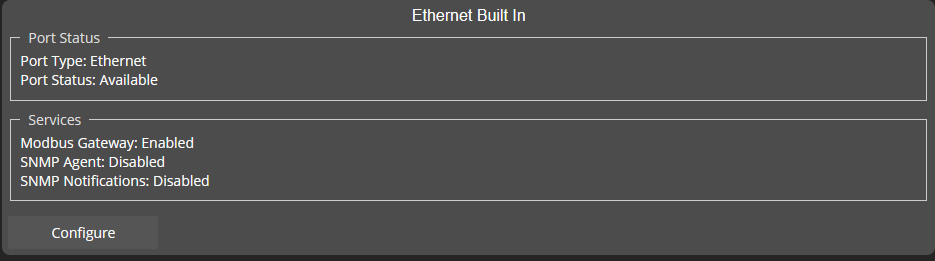
Ethernet Built In Module
Click Configure button in the Modbus Gateway module.

Modbus Gateway Module
Confirm that Enable and Ignore Unit ID toggles are selected.
To update IP address: a) Navigate to Setup. b) Navigate to Communications c) Use the Ethernet/Wifi/Bluetooth menu option.

Updating IP Address
Click the local network icon to view IP address settings.
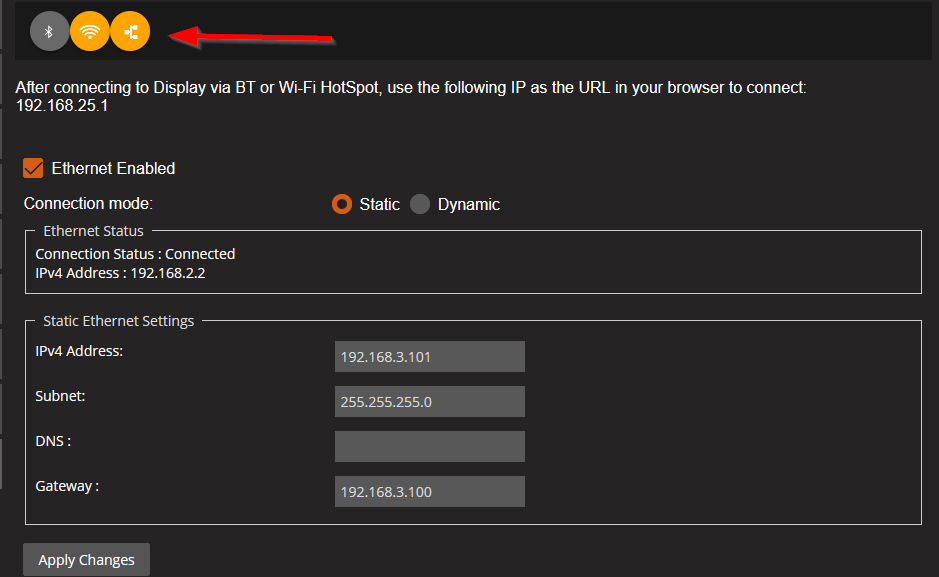
IP Address Settings
Update to the values provided here and be sure to click Apply Changes button.
Ethernet Enabled | Toggled on |
Connection mode toggle | Set to Static |
IPV4 address | 192.168.3.101 |
Subnet | 255.255.255.0 |
Gateway | 192.168.3.100 |