Fuel Level Indicator in Site Groups
Fuel level availability is available in the summary view. Permissions need to be enabled to access the board, which provides a summary view of configured parameters, which can include fuel levels.
We will be pushing out an enhanced Generator Run Report that will include Fuel Level values in the coming weeks. Stay tuned to the Announcements page for details.
This section provides steps to view fuel details once access is enabled.
From the map view, select the settings gear in the upper right corner of the page.
Select the Group Schedules menu option.
With the Live Tab selected, choose a Group from the drop-down menu.
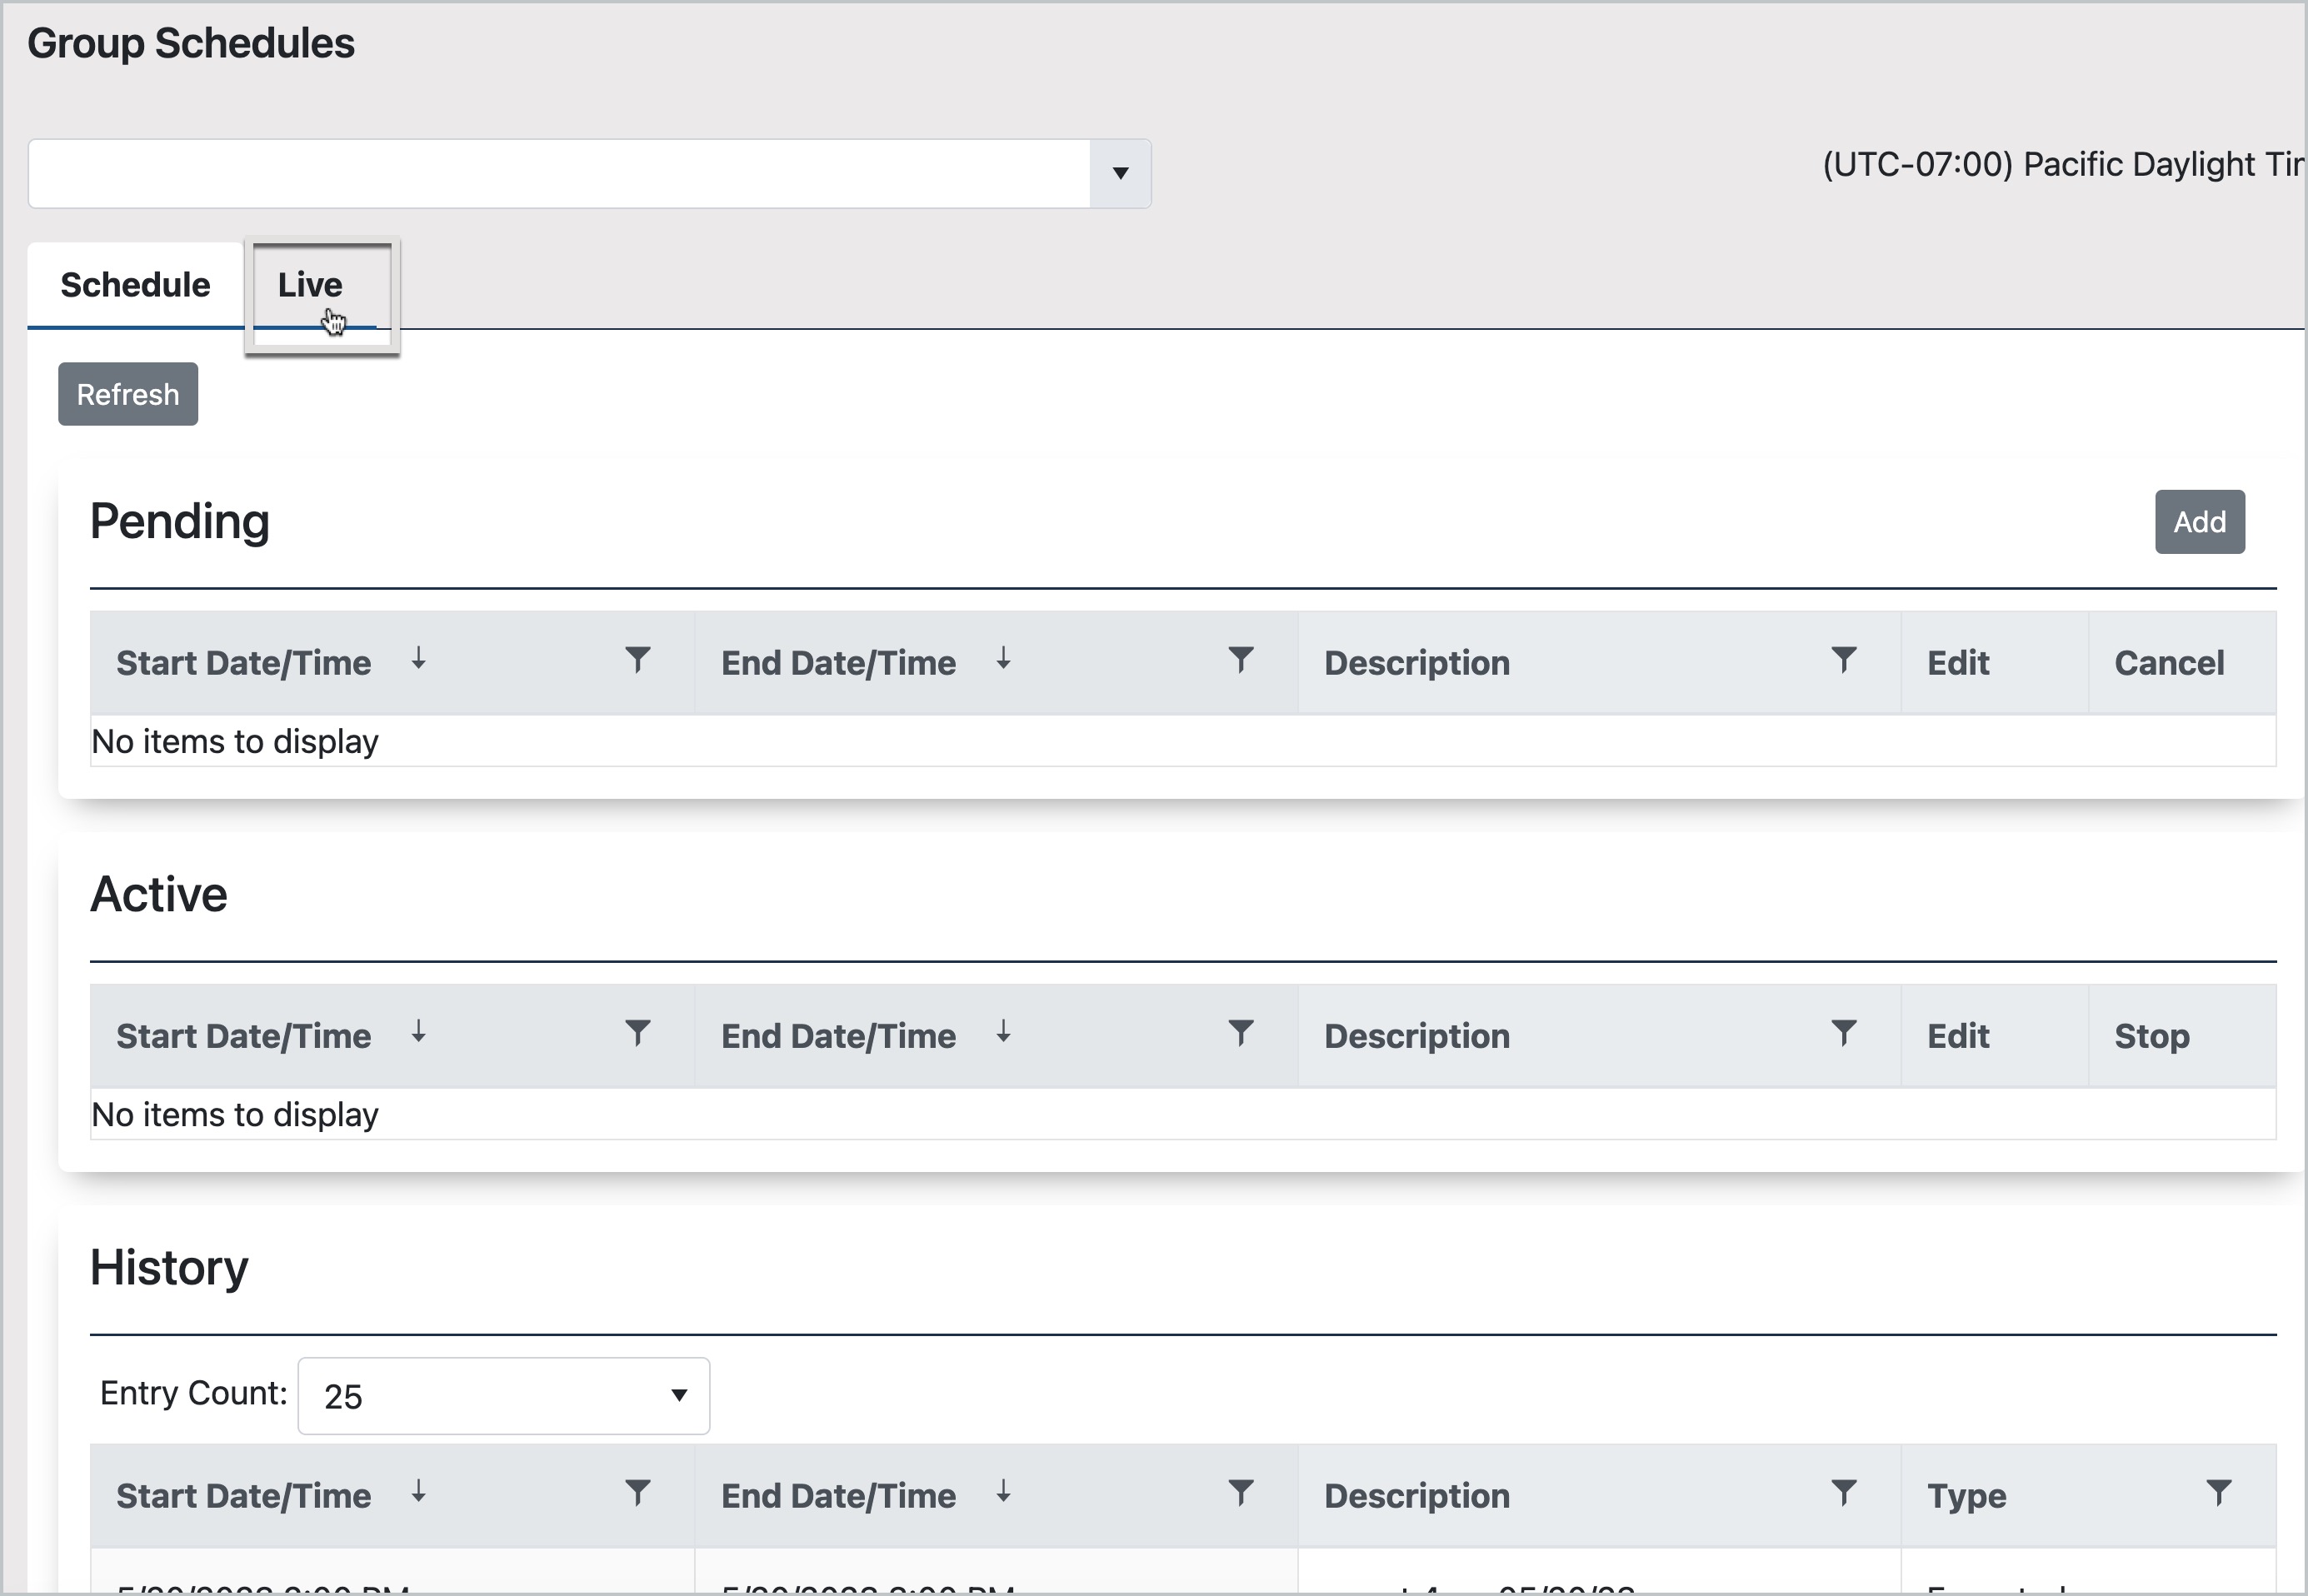
Configured Group Schedules

Making Group Selection
If configured, Fuel Level values by site would be indicated in each row in the summary view. In this capture, values are displayed in percentages.
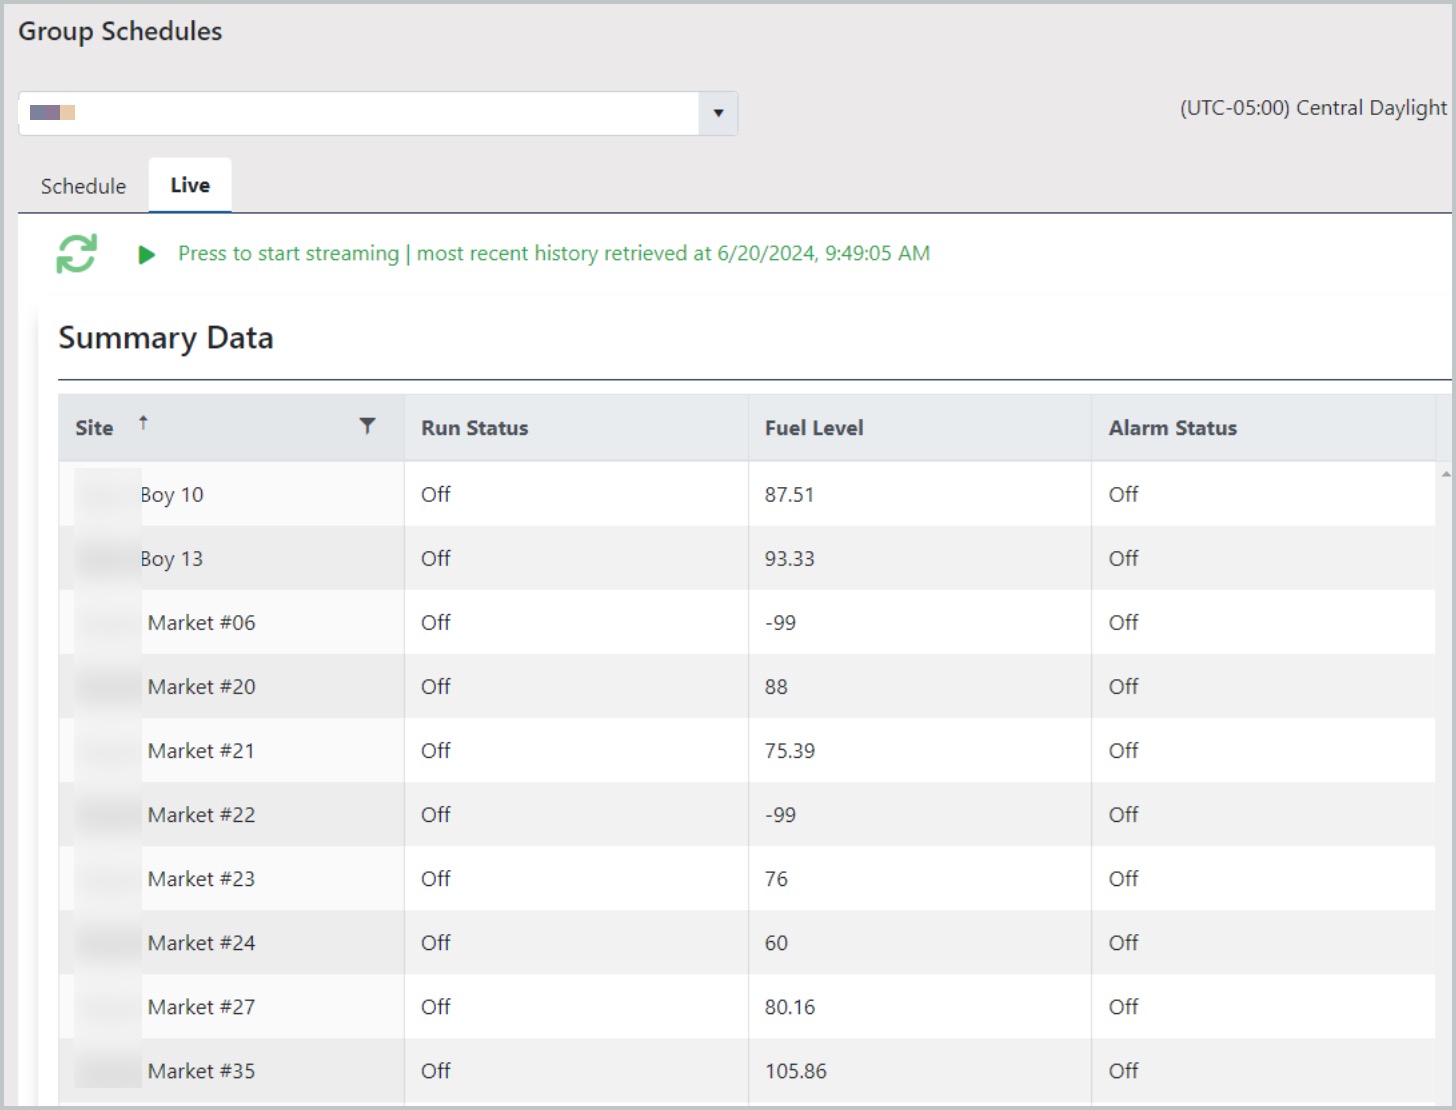
Listing of Fuel Levels
Values exceeding 100 percent, as in the last row captured, indicate overfilling.
Configuring and Modifying the Group
When associating with a group, any new sites need to be explicitly added in the group modal. This section contains the steps needed to proceed with this association.
Fleet size is subject to scale limitations. Please contact Support if you are enrolling a large number of sites to the platform.
Return to the Settings menu.
When adding Sites to existing Groups, most often the user will be using the Group Summary Configuration option so that values can be configured for the Summary view.
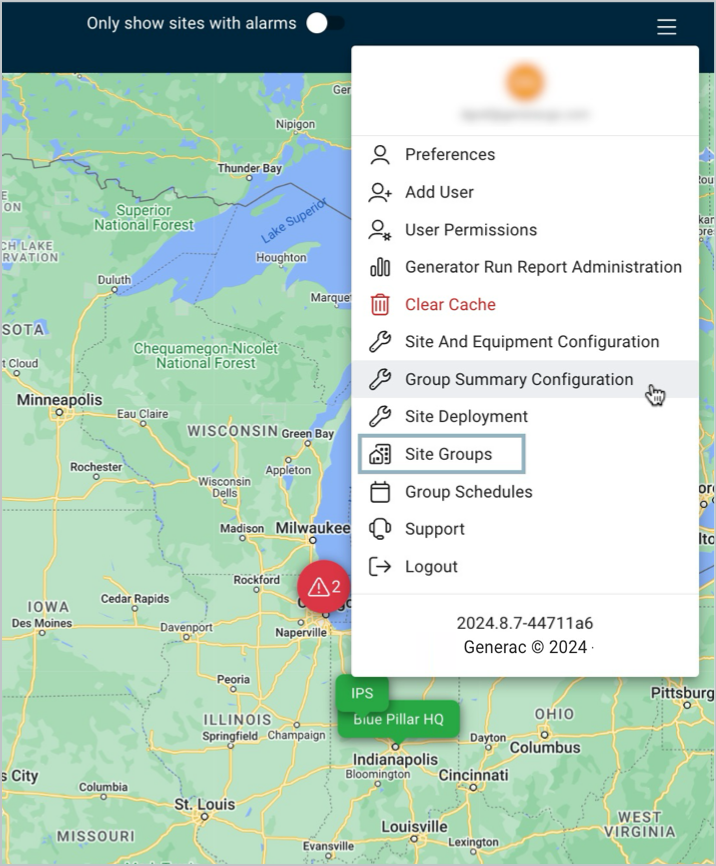
Group Summary Configuration
Later, if making edits, select the Site Groups option from the Settings menu and proceed with modifications to existing Site-Group associations.
Make a group selection. Click Edit Group to add sites and summary values to an existing group. You can also create a new group here by clicking the New Group button.

Editing Group or Creating New Group
To add a site, choose from the Available Sites, then use the arrow button to move the item to the Selected Sites section in the modal.
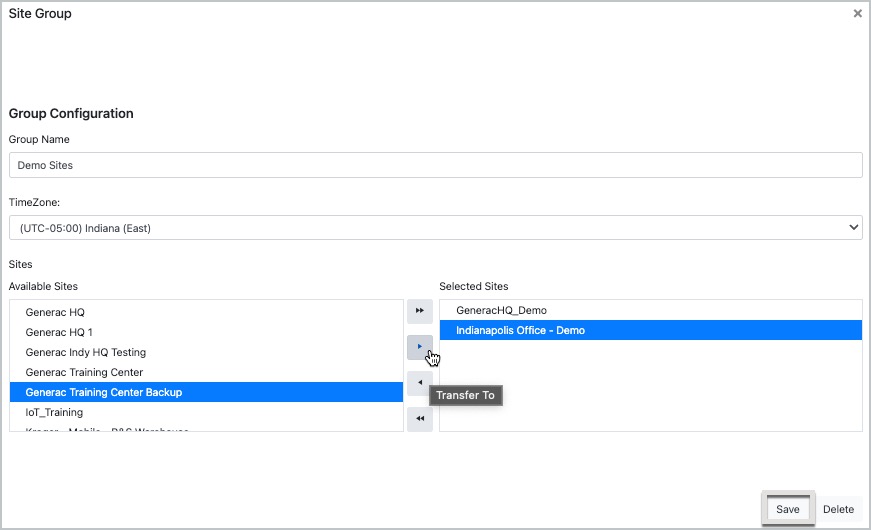
Adding Sites to Group
Click Save (see lower right section of modal) to maintain updates.
Click next when ready to proceed.
Click Edit icon to modify existing data points by site.
Refer to the end of this topic for detail on adding a new line item.
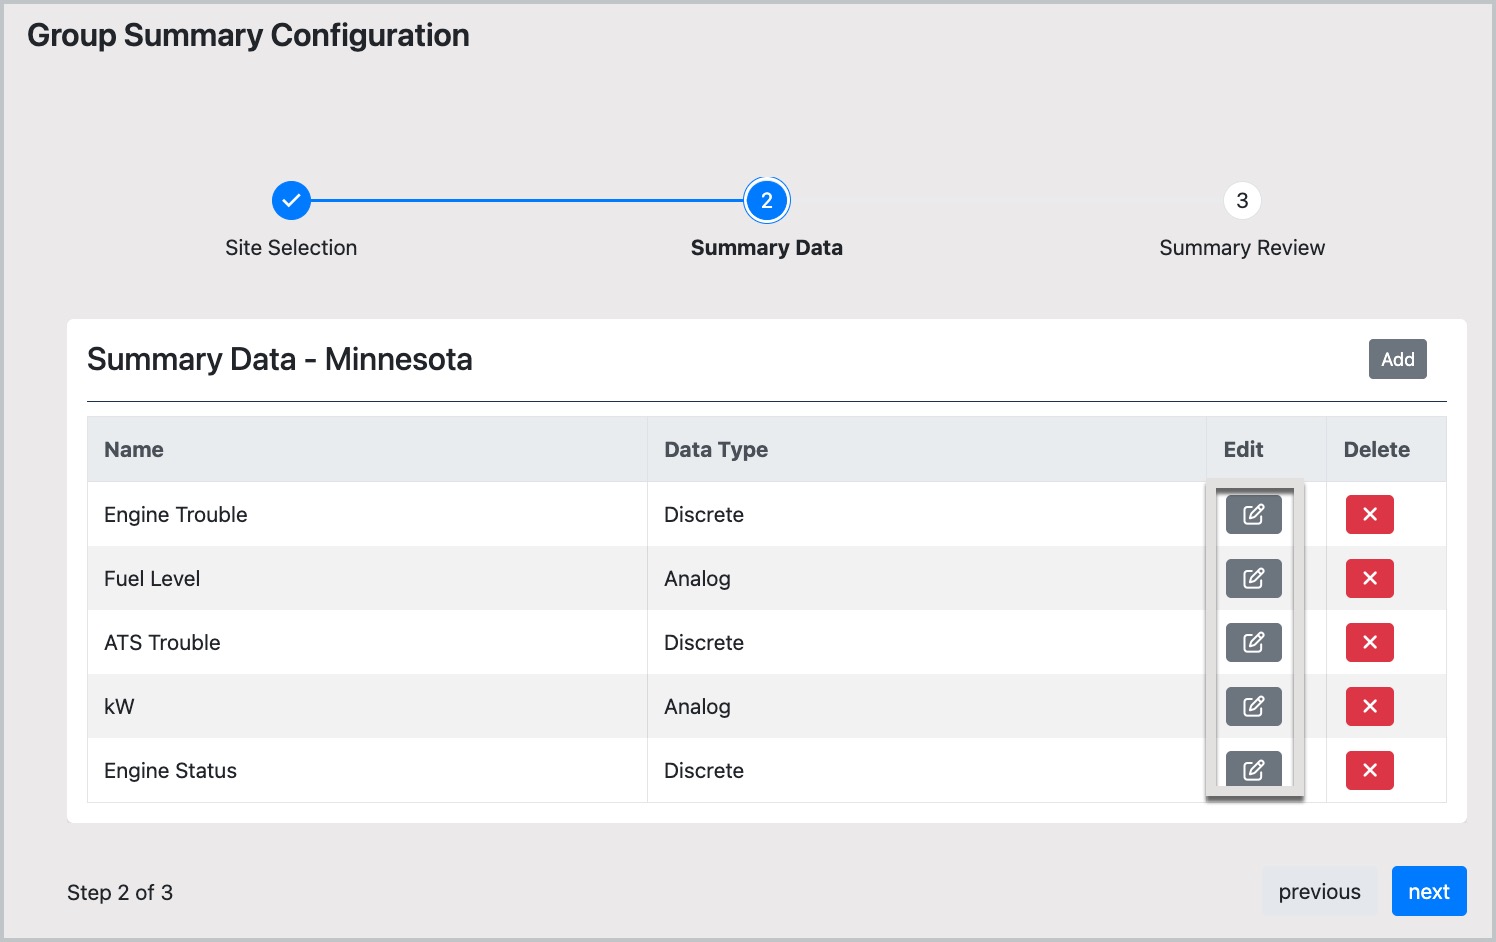
Choose from the available data points using the arrow buttons to move them to the Selected section in the modal.

Selecting Values for Summary View of Data Points
Try the Site and Text Filters under the Site Data heading to isolate points at the new site.
When configuring for Fuel Level, be sure the correct data point is selected.
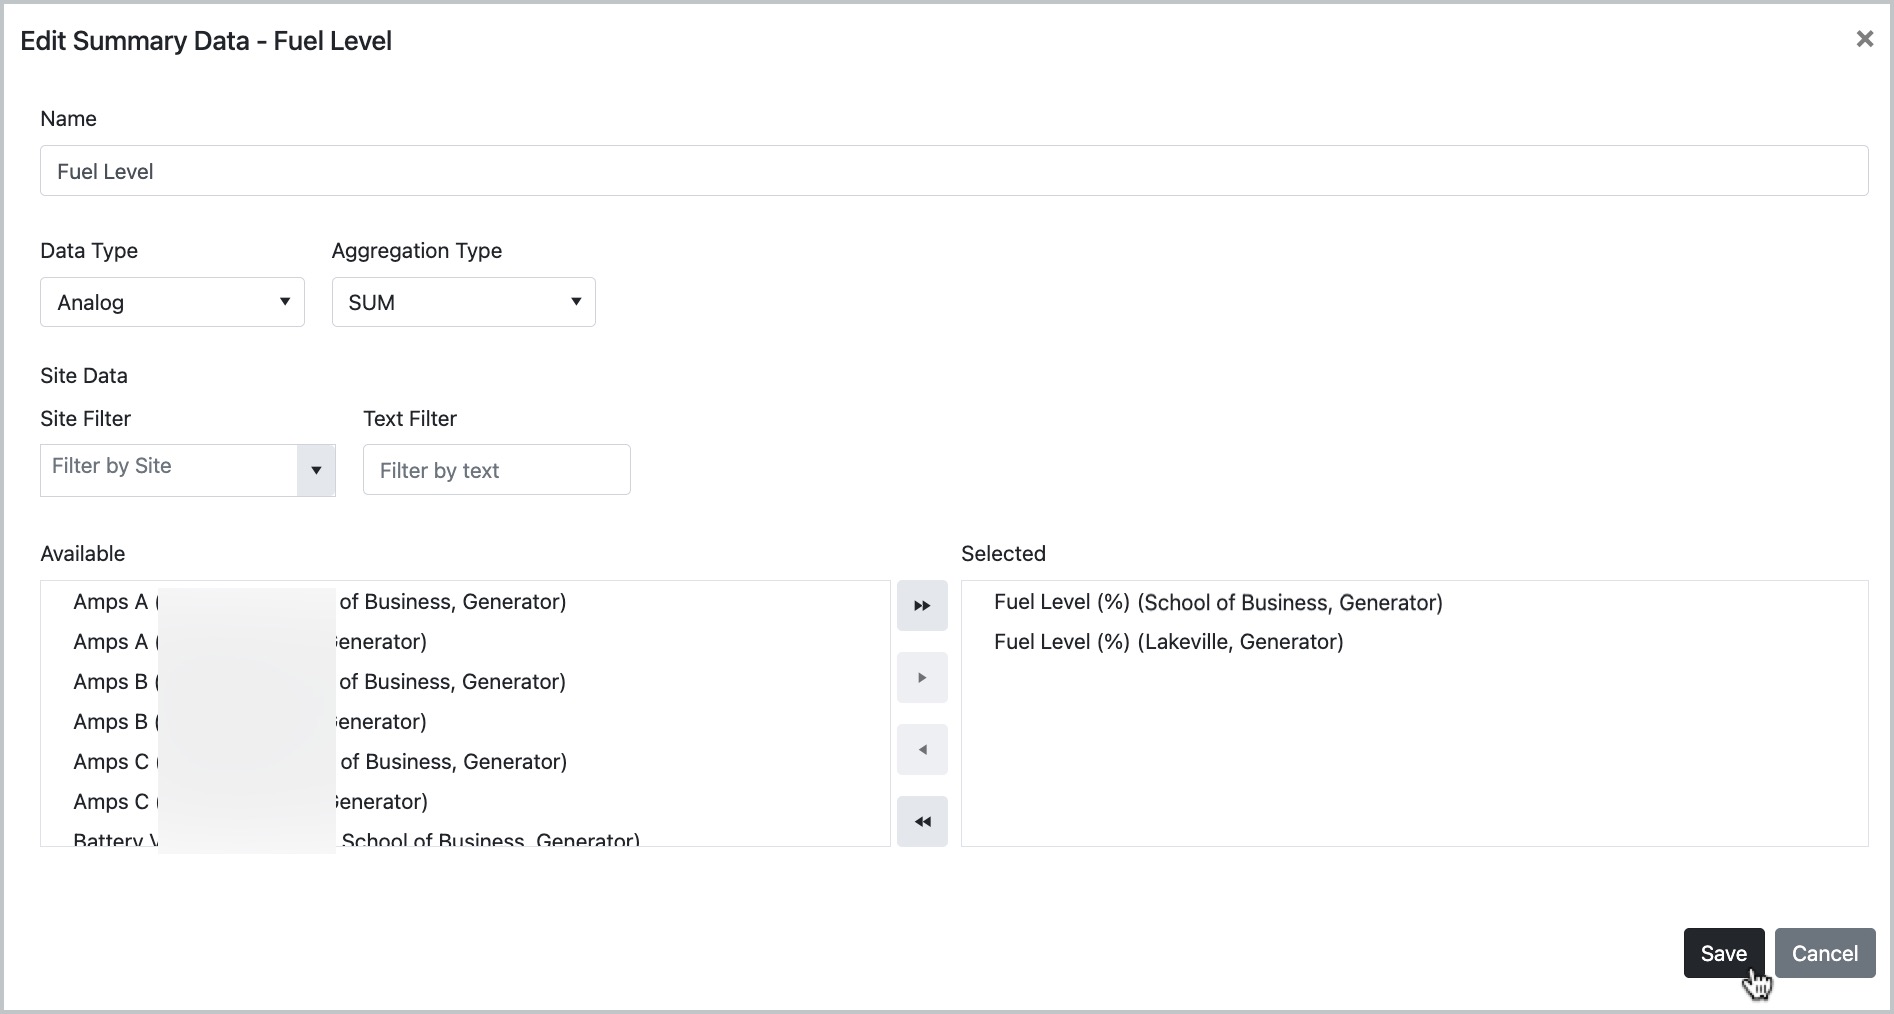
Fuel Level Data Point
Click Save.
Repeat for each data point and then click next.
Click Save when complete.
To add a new data point for the summary view, the steps are the same. Start with the Add button (see step 7). Then be sure to enter a name in the modal to create the new line item.
Configured data points appear as column headings in the Summary Data view from the Live tab.
.jpg?inst-v=937239c8-87ea-460c-ab29-063831acbc57)
Summary Data Sample
Once telemetry is received the Summary Data view will display values for the data point.
